Hello, Maureen here,
for
Heartfelt Creations. I have a tutorial for you today on how to create a
Faux Hammered Metal look for backgrounds on your cards or scrapbook pages.
The Heartfelt
Creations products you will use are:
Other things you will
need are:
Metal heat-resistant
tape (found at Home Depot, Lowe’s, etc.)
12” X 12” piece of
chipboard (I used back of a paper pad)
Burnt orange card stock (or any color you
choose)
Orange and natural
twine
5” X 7” pre-scored
Kraft card base
2 jeweled brads
Vintage Photo
Distress ink
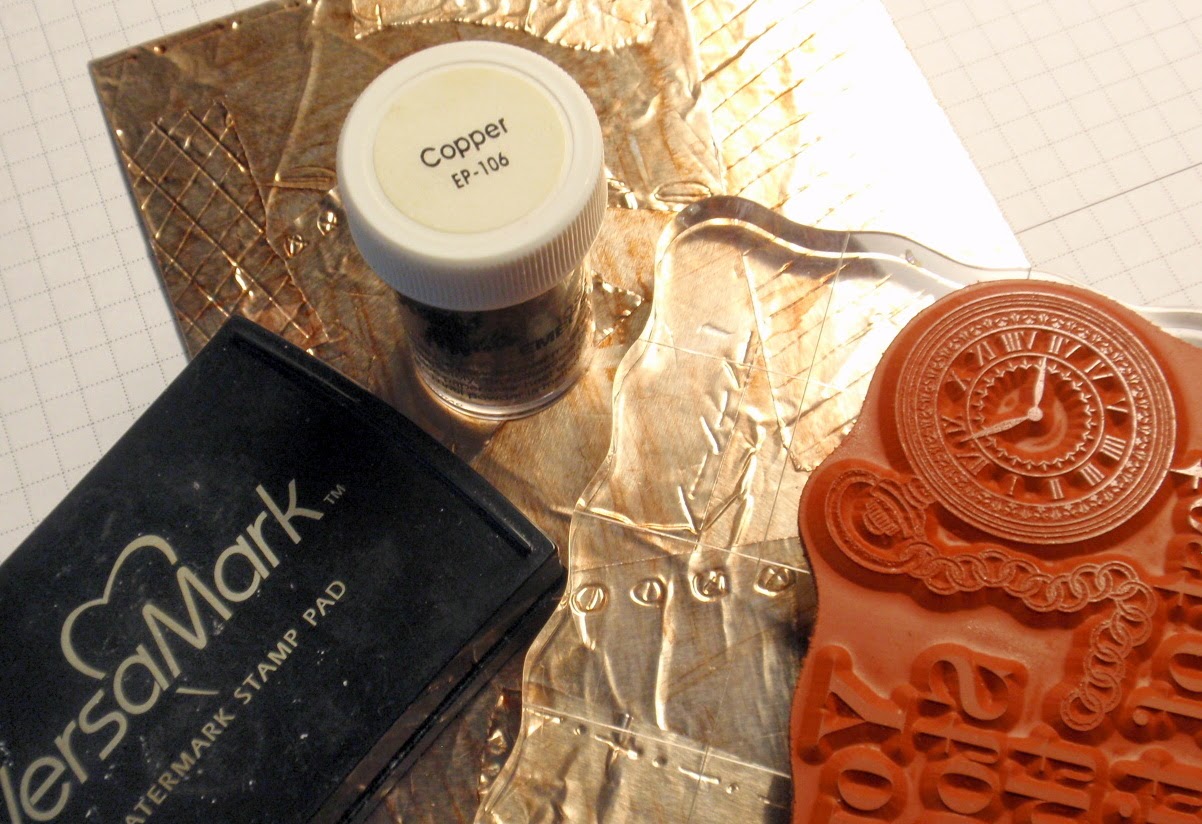
VersaMark Ink
Copper embossing
powder
Ginger Alcohol Ink
Blending tool &
felt pad
Pop-Dots and glue
Keep in mind any of
these colors can be changed to suit your preference.
Step 1. Map a 5” X 7”
area, with pencil, in the center of your cardboard or chipboard, extending
lines all the way to the edges if you are going to make a card, so as to make a
cutting template. Not necessary for a scrapbook layout.
Step 2. Cut two 9” pieces of metal tape.
Tear (so as to have jagged edges) five 4 ½” pieces of tape
.
Step 3. Peel backing
off tape, one strip at a time, and adhere to chipboard to form an “X” making
sure to extend over mapped corners. Be extremely careful not to rub the edges
of this tape, just tap it into place. It can be quite sharp!
Step 4. Cover
remaining chipboard with 4 ½” pieces, tearing more pieces if necessary. Don’t
try to be neat, the more wrinkled and scratched this is, the better it looks!
If you are making a background for a 12” X 12” layout, cover remaining exposed
chipboard with tape.
Step 5. Place the flower shaping pad from your Deluxe kit
under the chipboard. Using the 2mm nib from the Deluxe Flower Shaping Kit, make
random patterns on the tape. Lines, cross-hatching, circles, stitching, etc.
Step 6. Generously
saturate felt pad on blending tool with alcohol ink, and wipe across the metal tape. You can re-wipe
and pounce at this step to get the
look you desire. I chose mine to appear as if it were rusty.
Step 7. Cut your 5” X
7” card front at this time. I used a guillotine cutter and didn't try this step
with a standard slide/scale paper cutter. I'm not sure if this would cut through the chipboard and tape.
| Step 8. Stamp My Hero background stamp onto metal card front using VersaMark ink. Ink up the watch and boot areas and stamp onto the burnt orange card stock. From the Everyday Hero Newsprint set, stamp the arrow banner and from the Everyday Hero stamp set stamp the buckle onto the card stock as well. Dust all with copper embossing powder and heat set. Fussy cut the watch and boots.
Step 9. Cut arrow banner and buckle with matching Everyday Heroes Die.
|
|
|
|
Step 10. Sponge Vintage Photo ink on edges of die cut and fussy cut pieces. This will give them a look of old worn leather.
Step 11. Thread banner through the buckle and add pop-dots to backs as pictured. Do not add pop-dots to ends of banner as they will be held down with brads.
Step 12. Attach pieces to card front, being sure to cover watch and boots with fussy cut pieces. Tie twine to left side of card. Using piercing nib and pad from Deluxe shaping kit make holes and insert brads.
Step 13. Fold 5” X 7” pre-scored Kraft card base and glue down metal card front to complete your card.
Thanks for joining me for this fun little picture tutorial which happens to be great for a man card, which for myself sometimes can be a struggle. I’m hoping you try this and have fun with it.
Happy crafting, from Maureen
|